How to download the workflows?
Workflows are available to download here.
How to import workflows?
![]() Please note that you need to be a JIRA System Administrator to import this workflow.
Please note that you need to be a JIRA System Administrator to import this workflow.
JIRA Server
- Click on the cog icon and select 'Issues'.
- Select 'Workflows' in the left menu.
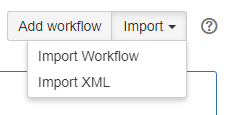
- Click on the Import button and select 'Import Workflow'.
- Select 'From My computer'.
- Click 'Choose file', select the workflow you want to import, and click 'Next'.
- Rename the workflow in the next screen if required and click 'Next'.
- Map the new workflow statuses to your existing workflow statuses, or create new ones as required. Once you're ready, click 'Next'.
- In the last step, review the preview of the workflow import. If everything is as expected, click 'Import'.
A message will be displayed if the workflow has been successfully imported.
Additional configuration details are displayed on this page. Please make sure to read it and save it for your own records.
JIRA Cloud
Importing workflows (XML or JWB) into JIRA Cloud is restricted, however there is a workaround with instructions provided by Atlassian.

